
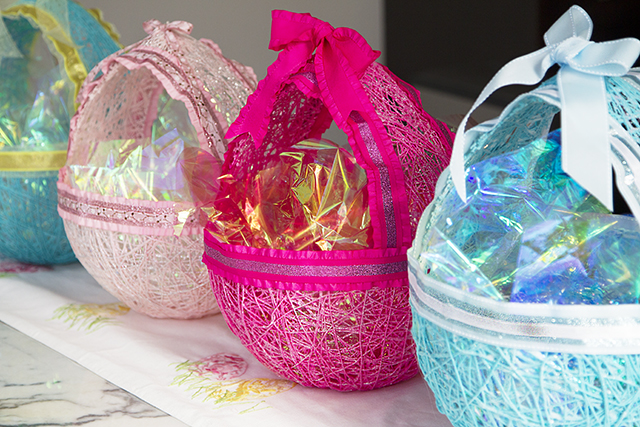
Since originally posting this beloved Easter Basket back in 2013 I’ve had dozens and dozens of individuals thank me for sharing the process and equally as many send questions about these homemade treasures. I thought it would be a fabulous idea to repost this gem of a DIY and include a FAQ at the bottom of the post including the most commonly asked questions from my readers. I’m also including additional photos showcasing the baskets I’ve made along the way for my very own little family of four.
Growing up we always had the most wonderful homemade Easter baskets that my mother made for us. What I loved most is that you couldn’t find them in a store, and not a single other friend of mine had the same one. Those little baskets are still put out every year at my mom’s house, still holding up strong, and they’re filled with decades of memories. Needless to say I wasn’t sure if I wanted to share this little family tradition, but it’s just too wonderful not to. All the credit goes to my cute little mom and her crafty little self. Happy Easter everyone, have a fabulous weekend!
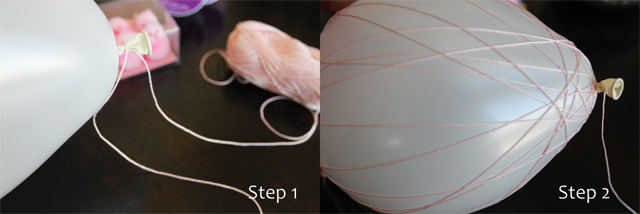
Step 1: Blow up balloon to the desired size that you would like your basket. Tie the end of the string to the balloon, making sure you leave approximately 30cm on the end.
Step 2: Start wrapping the string around the balloon. It’s easiest to go lengthwise to start off. Once you’re done with one bundle, tie it to the beginning of the next bundle and continue until you have used all three or gotten the desired coverage.
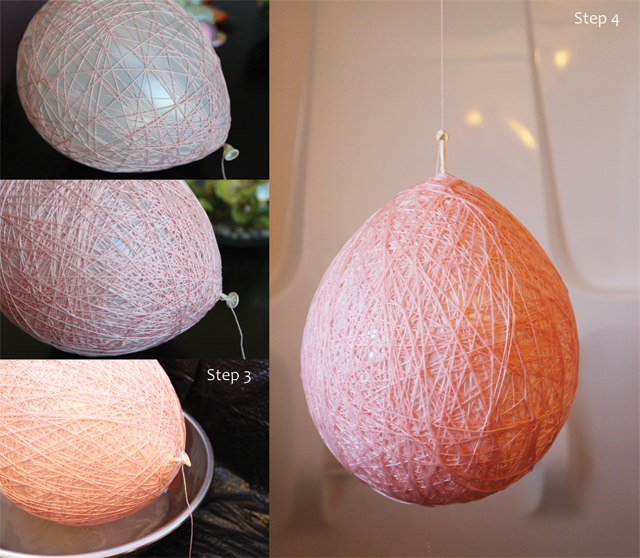
Step 3: Using a large bowl in the bathroom (covering the floor with garbage bags) create a water/sugar bath. One part warm water to two parts sugar. (You can add glitter to the water if you want your basket to have some sparkle.) Roll your balloon until it is thoroughly covered with the sugar water.
Step 4: Using the bit of string you left at the beginning, tie your balloon to the shower rod in your bathtub. If some strings come loose, don’t panic, once you tie your balloon up, you can re-wrap your string around the balloon. Once the balloon is nearly dry, you will need to cut it down and roll it again in the sugar/water solution. Rolling twice ensures an extremely durable basket. Once will not be enough.

Step 5: Once your basket is dry but there remains an approximately 2 inch diameter wet spot on the bottom, cut it down and place on parchment paper. Press down on the wet bottom to create a flat surface so your basket will be able to sit on its own. Pop the balloon.
Step 6: Draw out the area you wish to cut out to create your basket. I like to use a ruler to measure from the table up to ensure a straight line across the front of the basket.
Step 7: Cut out the drawn out area. Once you do so, you may use that first piece as a stencil to cut the other side. Remember this is a homemade project, it doesn’t have to be perfect.
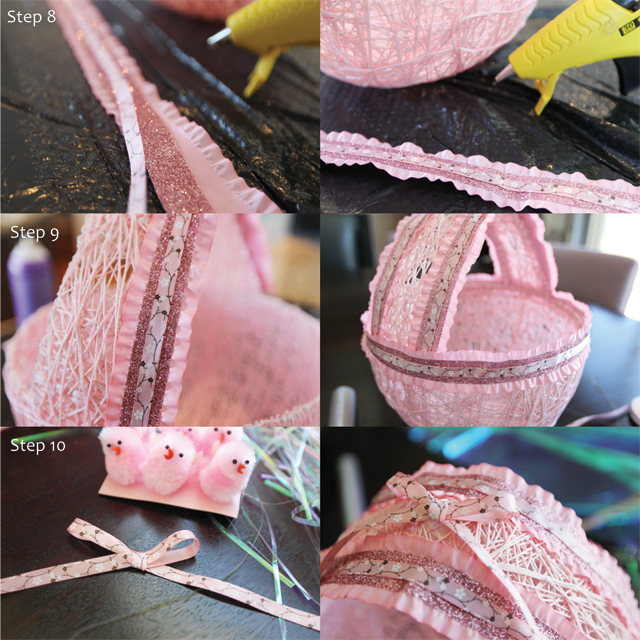
Step 8: I like to glue multiple layers of ribbon together to create a multidimensional look. Hot glue gun works best. If your ribbon is too thin the glue will show through, so pick a thicker ribbon or do a couple of layers.
Step 9: Glue ribbon to basket, starting with handles first. After the handle go all the way around the top edge of the basket.
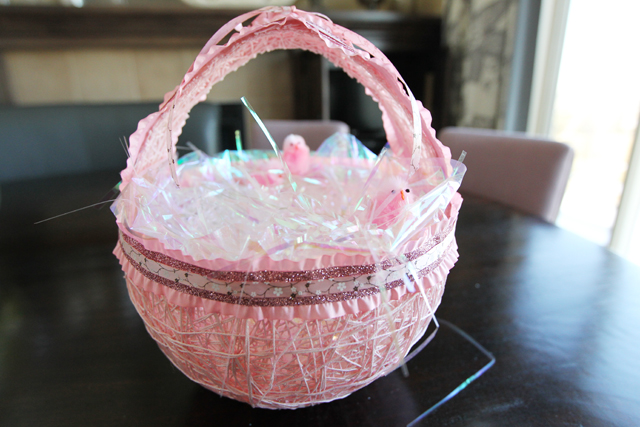
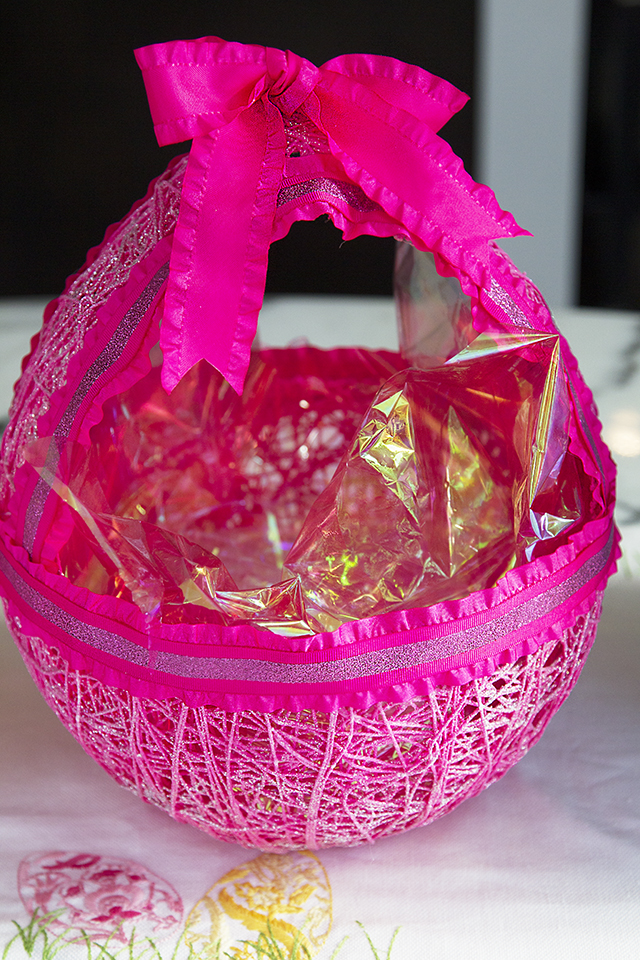
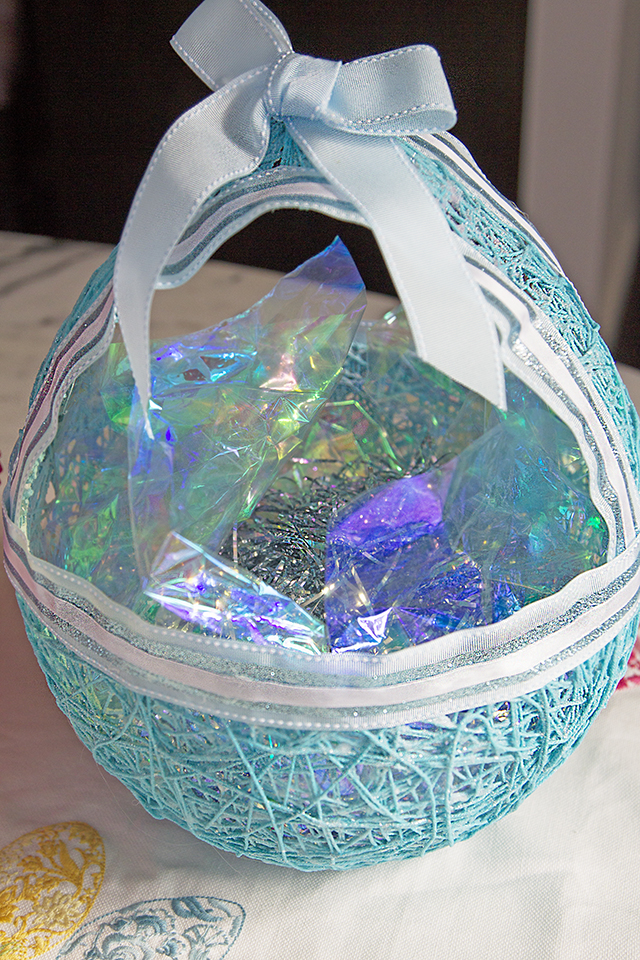
Step 10: Cover the hole at the top of the handle by creating a bow in matching ribbon and gluing on top.

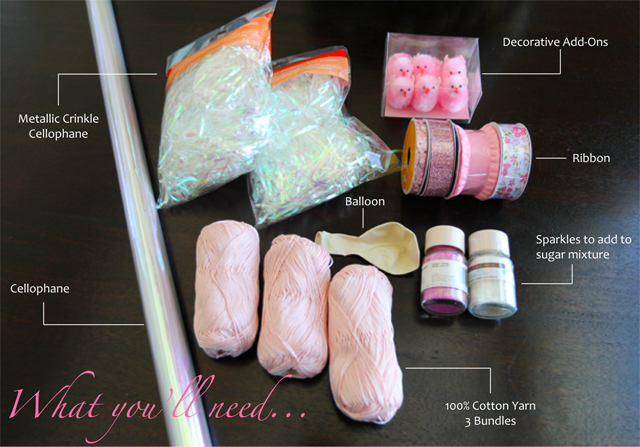
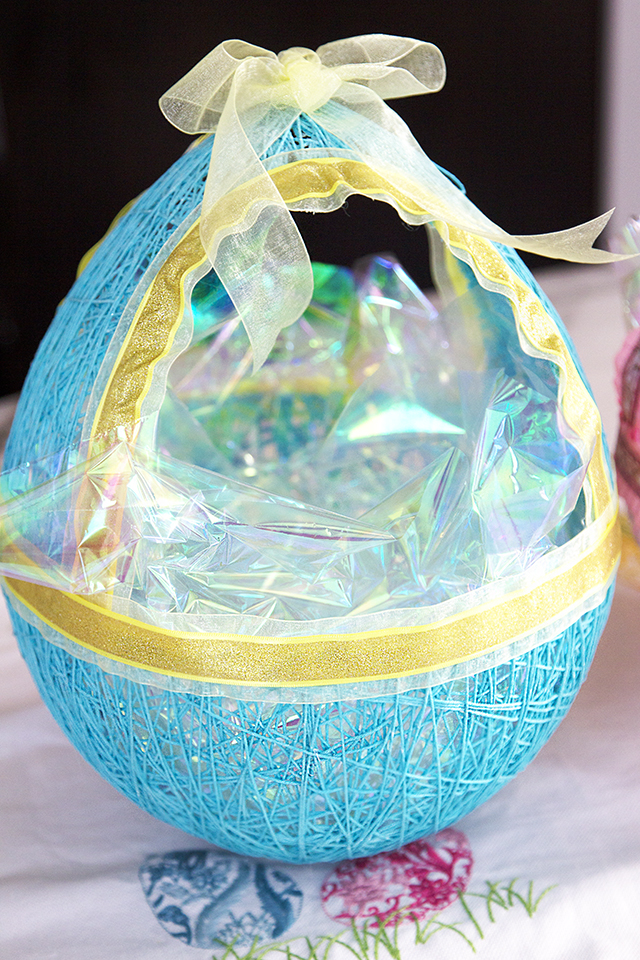
Step 11: Add your cellophane on the bottom of the basket, and fill with the metallic crinkle cellophane. Add any finishing touches or decorations, such as furry chicks, and you’re finished. Wait for Easter Bunny to fill with chocolate.
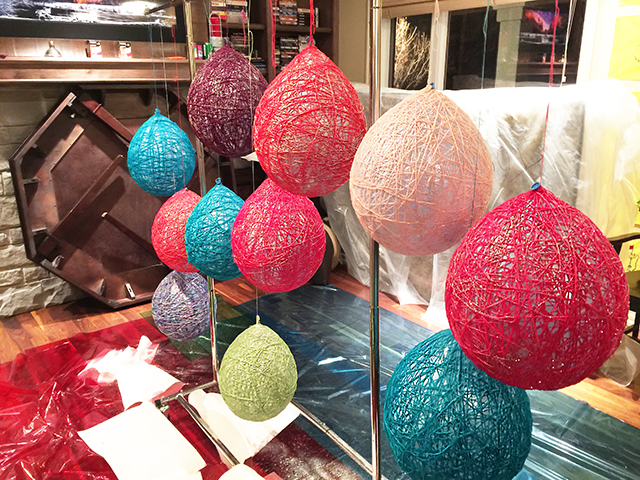
If the process seems daunting I would encourage you to assemble some friends or family and do it together. In the past we’ve gathered the gals and my mom, the ultimate Easter Basket expert, and scheduled out two nights to meet, one to wrap the balloon and do the initial sugar water coat, and another for when they’ve dried and we get to decorate. Whomever can go back and do a second sugar water dip often does so for the entire group. Thanks Mom. As you can see above you have to get a touch creative with the drying process, and in the past we’ve used a clothing rack, making sure to cover the flooring beneath the balloons.
FAQ
Q: Should I cook the water with the sugar or just mix it with warm water?
A: I have always heated the water separately and then added the warm water and the sugar to a large bowl, stirring until the sugar dissolves.
Q: How long does it take to dry?
A: After rolling it in the sugar water for the first time it should take approximately 12-24 hours for it to dry. If you’re able to hang it in the evening it should be dry by late morning. It takes approximately 24 to 36 hours to dry after the second time rolling it in the sugar water. Of course this will vary depending on where you live and how humid or dry it is. Remember to cut it down when the bottom is a bit soggy to create a flat bottom (as per the instructions).
Q: I would like to make this, but I can’t get the string to stay around the balloon in the beginning. Any tips?
A: It’s true, getting the string to stay on the balloon at the beginning is the most difficult part! My tip would be to hold the balloon upright, with the tie at the top, and slowly and firmly wrap it lengthwise (vertically). Wrap it once all the way around and then the second time, wrap it going in a perpendicular (90 Degrees) direction so it looks like an X from the top and bottom. Do this a couple of more times filling in the holes as you go and then I would do a couple of wraps horizontally around the middle of the balloon. Once there’s more string on the balloon it gets easier, I promise!
Q: The sugar water isn’t working, my basket isn’t getting hard, any suggestions?
A: If the sugar water isn’t working it could be a couple of possibilities. If your balloon completely dries and the yarn is not hard then it’s a sign that either you didn’t use enough sugar in your sugar/water mixture, or the sugar was too fine. In either case I would make a new sugar/water mixture, using more sugar and perhaps switch up the sugar from what you used to sugar cubes, which is a more coarse sugar. Cut down your balloon and completely dunk it in the new sugar/water mixture and rehang it to dry. This has happened to me before and it’s usually one of those two issues. Use a more generous amount of sugar than you did the last time, and again, check your sugar to see if it’s fine or coarse. Extra fine sugar doesn’t work well with this technique. Sugar cubes work amazingly well.
Q: When my balloon dries I can see where the sugar water dried on the yarn, why doesn’t it dry clear? I don’t like the way that looks, is there a trick to make it dry clear so you don’t see that?
A: This has happened to me before too. My guess is that the sugar wasn’t dissolved enough in the water, or there was slightly too much sugar used in the mixture. I try to embrace the look of dried sugar on the yarn by masking it with glitter or sparkles. You can use an adhesive spray around the balloon and sprinkle on a generous amount of crafting or fine sparkles. Or you could re-dunk your basket in another sugar water bath that has sparkles already added to it. You could also paint or spray paint the basket before decorating it to help with hiding the dried sugar on your Easter Basket. Though it may not be the look you’re going for, I have found that the extra dried sugar makes the basket extremely hard and durable. Also, once you’re done decorating it the dried sugar won’t be as noticeable.

If you enjoyed this article, please consider sharing it!


